Welcome to Excel Avon
Image Control in UserForm
DOWNLOAD USED EXCEL FILE FROM HERE>>
In today’s post, we will tell you How to use Image Control in UserForm Excel VBA, In the previous post, we taught you Data Entry with Checkbox by UserForm in Excel VBA and as we have learned how to insert a label, you will also need to insert a label for a image. image control is the UserForm control in VBA. Normally, it is easy for you to insert a picture into a worksheet in Excel. But do you know how to insert a specified picture into an Excel Userform? This article will show you a method to achieve it.
You can select and drag Image on the UserForm. Image control embeds a picture such as a jpg, jpeg, gif, png, bitmap, etc. It can be used on the UserForm. You can see how it works and more details about Image Control.
Let’s see how we work with Image Control.
Create Image Control in UserForm
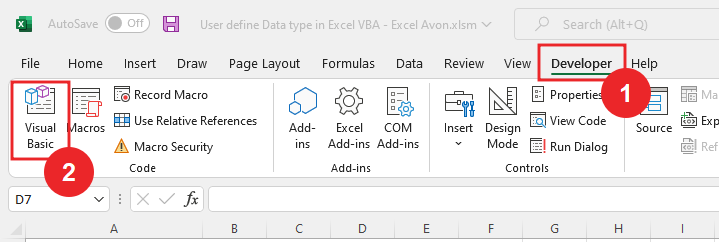
Ok, you must know how UserForm is inserted, let’s understand. For how to Use Image control in UserForm, we have to go like last time, first go to Developer Tab then click on Visual Basic’s Option as shown in the image below.
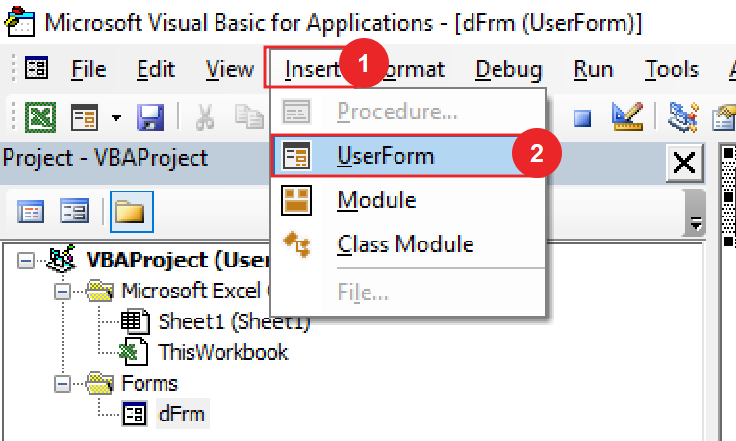
On opening in VBE, you have to go to Insert and then UserForm has to be inserted, as can be seen in the image.
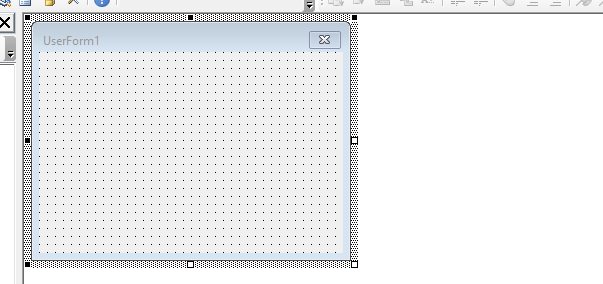
As you can see now, we have inserted the Userform, we will do some more work like insert label.
We will go to the toolbox, in the tool, we will select the label and then drag it to the Userform, then go to the properties of the label and change the caption of the label (Select Image).

Now we will go to the toolbox, from there we will insert the image control as you can see in the image, after that we will customize it according.
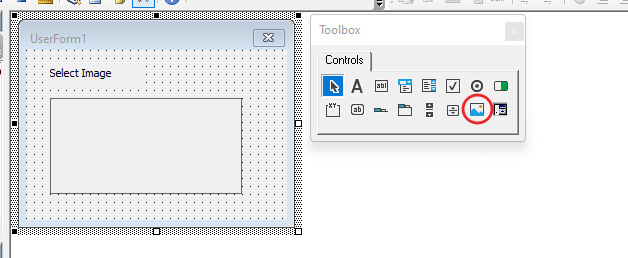
Now we are inserting the image manually, go to the properties of the image and select the picture option.

From here we will select image files jpg, jpeg, gif, png, bitmap, etc, here we cannot select png file.
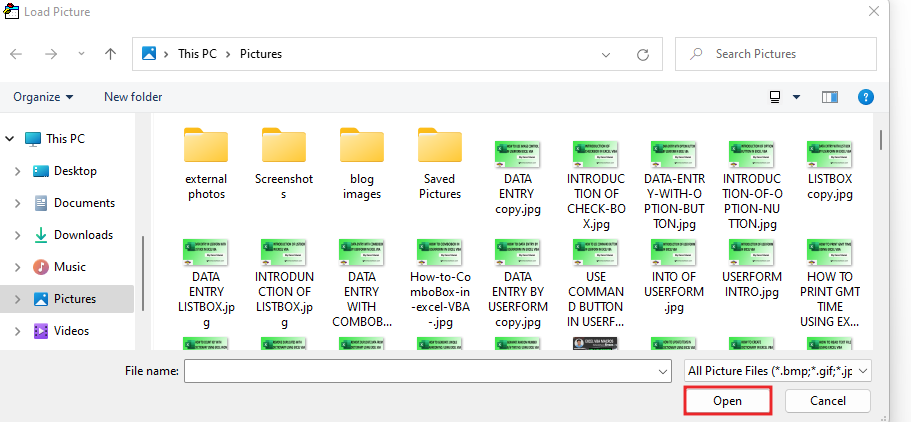
The picture is inserted in the image control but the picture is not fit in the control so we will fit the picture.
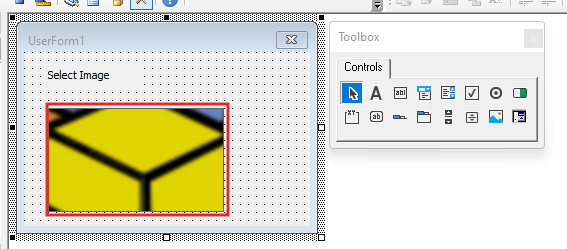
Now we will change the picture in the Picture Control so by going to properties we will go to PictureSizeMode and change it to PictureSizeModeStretch.

Insert a command box in the Userform. And with this you will also rename the command button (Upload).

Now we will click on the upload button, now we have done manual image insert now we will write code in VBE for picture insert. define variable as FD as FileDiolog and ipath as String.
Private Sub CommandButton1_Click()
Dim FD As FileDialog
Dim iPath As String
End Sub
Now set FileDiolog as folderpicker
Private Sub CommandButton1_Click()
Dim FD As FileDialog
Dim iPath As String

Set FD = Application.FileDialog(msoFileDialogFilePicker)
End Sub
Use filedialog with with statement, here we will turn off Multiselection so that we will not be able to select more than one file. For this we also choose the title name. We will clear the filter, along with this we will also add new filters according to the type of files we want to select.
Private Sub CommandButton1_Click()
Dim FD As FileDialog
Dim iPath As String

Set FD = Application.FileDialog(msoFileDialogFilePicker)
With FD
    .AllowMultiSelect = False
    .Title = "Select Image"
    .Filters.Clear
    .Filters.Add "Images", "*.jpg"
End With
End Sub
Now in order to show the Diologbox we can write show.
Private Sub CommandButton1_Click()
Dim FD As FileDialog
Dim iPath As String

Set FD = Application.FileDialog(msoFileDialogFilePicker)
With FD
    .AllowMultiSelect = False
    .Title = "Select Image"
    .Filters.Clear
    .Filters.Add "Images", "*.jpg"
    If.Show = True Then
    End If
End With
End Sub
Create a condition when the file is selected. Zero is used because the selected item should be 1. The selects items will appear in the string.
Private Sub CommandButton1_Click()
Dim FD As FileDialog
Dim iPath As String

Set FD = Application.FileDialog(msoFileDialogFilePicker)
With FD
    .AllowMultiSelect = False
    .Title = "Select Image"
    .Filters.Clear
    .Filters.Add "Images", "*.jpg"
    If.Show = True Then
       If .SelectedItems.Count > 0 Then
           iPath = .SelectedItems(1)
       End If
    End If
End With
End Sub
Now we’ll set UserForm image 1, Load Picture on path.
Private Sub CommandButton1_Click()
Dim FD As FileDialog
Dim iPath As String

Set FD = Application.FileDialog(msoFileDialogFilePicker)
With FD
    .AllowMultiSelect = False
    .Title = "Select Image"
    .Filters.Clear
    .Filters.Add "Images", "*.jpg"
    If.Show = True Then
       If .SelectedItems.Count > 0 Then
           iPath = .SelectedItems(1)
       End If
    End If
End With
If iPath <> "" Then
    Set UserForm1.Image1.Picture = LoadPicture(iPath)
End If
End Sub
After writing the code we will go to the UserForm form and run the code.

Now the Userform has opened here we will insert the image. here selects any jpg file.
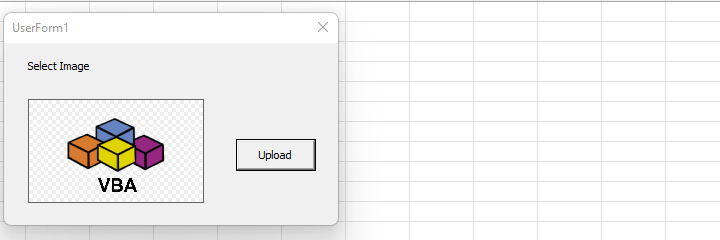
Click on the upload button and then we will open a pop where we will select the files. and click open button.

You can see the picture has been inserted.

Therefore, I hope that you have understood How to use Image Control in UserForm in Excel VBA, maybe if you do not understand some options, then you can comment us, which we will answer soon and for more information, you can follow us on Twitter, Instagram, LinkedIn and you can also follow on YouTube.
DOWNLOAD USED EXCEL FILE FROM HERE>>
You can also see well-explained video here about How to use Image Control in UserForm in Excel VBA


